Cheat Sheet - Quick Access to Your Short Cuts

Short cuts can be an invaluable tool when using any application. It makes work efficient by saving you time from having to navigate the cursor to the menu bar. The challenge I have is just remembering those short cuts, especially when I am using a variety of applications.

Cheat Sheet for the Mac OS resolves this by providing a complete list of short cuts for virtually any open application. Simply press and hold the Command button and a "cheat sheet" appears on your screen detailing all the short cuts for that particularly app. Particularly helpful for when I'm using Adobe Lightroom or Photoshop, it also becomes a great tool for when I'm using my web browser or Mail.

The customization on this application is minimal. You can set it up to launch on start-up and change the duration that it remains up once you release the key, but that's about it. However, that is more than enough as it provides me a great way to remember a shortcut that's eluding me.

The application is free and is available through App Store.

Review of Alien Exposure 4

Alien Skin Exposure 4 


Push-button, analog-funk in a digital age 

by Martin Taylor

Fern Processed in Exposure 4
In a perfectly clean, digital world it is easy to romanticize the film look and the results we achieved after spending hours in a chemical darkroom in the past. The funny thing is, back then we were usually trying to make perfectly clean, neutral, realistic images and we often cursed the affects the analog process imposed on us. When digital came along, I for one couldn’t wait to leave behind problems with dust and scratches and the inconsistency of chemicals. The promise of never having to spot a print again was a Nirvana I couldn’t wait to inhabit.

Fast forward a decade or more and the popularity of Instagram and the Impossible Project and their like demonstrate a thirst for an analog feel in a digital age. Admittedly, a lot of ‘digital sucks’ hipsters never knew a time when there wasn’t a choice between analog and digital and, like most new converts, they have been born-again as puritanical zealots. But I digress; for the rest of us who want the flavor of analog processes without the toxic chemicals there are many options at many price points. From the cheap (though not cheap for Facebook) Instagram at one end to plugins like Aliens Skin’s Exposure 4 at the other. But we’ll get back to price in minute; for now let's look at what Exposure 4 can do for you.

Alien Skin's Exposure 4 UI

Instagram on steroids? 

It sort of is but in another way this comparison belittles Exposure 4. It’s nearly as easy to use as Instagram. For the purposes of this review I was using it mainly within Lightroom but I also tried it from Elements and Photoshop too and it felt properly integrated into them all. From Lightroom ‘Edit in Exposure 4’ launches the Exposure plugin and it fires up pretty quickly. Even without reading and documentation you will be up and running in no time. A preview image takes up the center of the window showing the effect of your filter in real time. You choose your preset or saved custom preset from the list in the bottom left quarter. The top left quarter preview image shows the effect of a preset just as you roll over it, even without clicking. It also shows the whole image with a indicator frame showing what area of the image you’re looking at in the main preview window. This is useful when you have zoomed into your main image (using the scroll wheel achieves this) and got lost within your image.


Color Presets in Exposure 4


B&W Presets in Exposure 4

There are hundreds of presets to choose from creating effects that date back from the dawn of photography through to the latest film stocks and trendy cross-processing. You can filter the effects by monochromatic and color of you can search if you remember any part of the name of the effect you are looking for.

Civil War Fort Point Powder Room processed in Exposure 4
Once you have applied a preset you can use the tabbed controls on the right side of the window to customize the result. This is useful if, like me, you found the presets a little heavy-handed and you wanted to dial back the effect. Before applying an effect I did try to get the exposure as accurate and as neutral as I could in Lightroom. Even so, after applying an effect, I did often find some range of tones would be looking much darker than I wanted. This is why I found the levels curve adjustment within the tool so useful. I’m sure I could have tweaked the effect after the fact when I was back in Lightroom but it was so easy to correct in Exposure I found myself using the levels on nearly every image I applied a preset to.

Although the presets may be a bit unsubtle out of the box that’s not to say that the effects you can achieve are not professional. When you tweak a preset and you like the results you can save your own presets for future use. The film grain effects, borders and various alternative technique overlays are amazingly convincing. The effects you can achieve are pretty inspiring and you can find yourself wasting hours on one image messing around with presets and tweaking them as you see fit. On the other hand, if you have a clear idea of what you want to achieve you can very quickly find a suitable preset to achieve it, tweak it to perfection and be done with the image in soft order. A nice feature is that, in Lightroom, you can work on several images at once. This means that, if you find the look you want and apply it to one image you can apply a consistent look to other images you think will benefit from the same look.

Conclusion 

Golden Gate Bridge processed in Exposure 4
As someone who loves ‘straight photography’ I’m conflicted by the use of push-button effects to add funk to pictures. I love the ease of use and flexibility of Exposure 4. I like how it integrates into Lightroom, Elements and Photoshop equally well. Some of the effects you can achieve are amazing and look very authentic to my eye. It is so easy to use I do feel a little guilty showing the resulting images: am I being a fraud showing an effect I haven’t earned? Would I feel less guilty if it had taken me an hour to achieve the same effect following some long-winded Photoshop tutorial?

Truth be told, this product is probably not aimed at me. I am not rich enough or trendy enough to be their target audience. I do see Exposure 4 being incredibly useful for photographers who need a grungy, retro-look with a fast turn around. Senior and wedding photographers may find it pays for itself very quickly if you have a certain kind of client. For those kind of photographers the relatively high price might be an advantage because it will keep the riff-raff out. Uncle Jim is unlikely to buy Exposure 4 if he’s currently using Elements to process his images. This means that even the out-of-the-box preset looks will not be seen that commonly on Flickr. This exclusivity maybe what you need if you’re selling an expensive post-processed look as part of your package. Certainly this grungy look is very fashionable at the moment. Exposure 4 is one of the simplest, most customizable ways to achieve many of these looks resulting in very professional looking images. If you need this high-concept look, Alien Skin’s Exposure 4 may be just what you’re looking for.


Surf's Up: Hands on with the Olympus OM-D E-M5


You would think that living in Southern California during the summer, I wouldn't need much reason to head out to the beach and  enjoy all that it has to offer. The weather combined with the energy of the crowds can make for a great time outdoors, especially for the photographer. 

The reality is that I've not hit the shores, much less the water this season, which is why I was excited about an invitation from Olympus to use some their latest cameras during the Surf City competition in Huntington Beach. 

I had about three hours to go out shooting with the OM-D E-M5 as well as  the TG-1 iHS, their waterproof compact camera. So, this isn't an exhaustive and detailed review. That's something for another day if and when I can use the camera for a longer period of time. But for those curious about this model, I thought it would be interesting to share my experience with it and some of the images that I produced that day. 

Now, I have been a big fan of the Olympus Pen-series of camera, particularly the Olympus PEN EP-3, which is the first digital camera in my experience with fast enough autofocus to make it viable as a definitive street photography camera. The shutter lag/ focus delay in many cameras even the highest end DSLR made spontaneous and instantaneous street shooting a challenge, if not frustrating. So, when I heard that the the OM-D E-M5 had improved on that autofocus system, but in a design more in line with a DSLR, my curiosity was peaked. 
Within moments of getting the camera in my hand, I knew that the autofocus response that I had come to enjoy with the EP-3 was being delivered here. My ability to recognize the potential of a scene, compose my shot and make the photograph was not hampered in the least by the camera hunting for focus or even the slightest lag. I didn't have to slightly depress the shutter button halfway to detect focus before hand as I often have to do with many other cameras in order to ensure I capture that critical moment and produce a sharp, in-focus photograph. 

Unlike many of the current breed of mirror-less cameras, the OM-D E-M5 features an OLED viewfinder as well a LCD display. Now, I'm never been a fan of these, having a been so accustomed to a traditional optical viewfinder. But I have to admit, I really liked that image I saw looking through the viewfinder. It's as close to the "real thing" as anything I've seen thus far in the form of an EVF. 

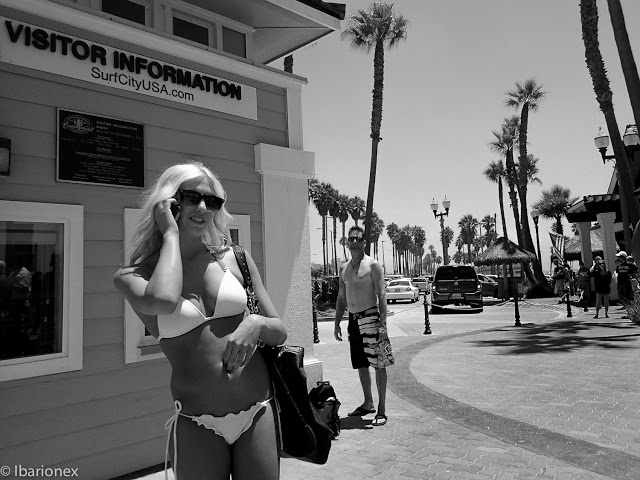
After a short time getting familiar with the controls of the camera including how to toggle back and forth between the EVF and the LCD, I got to shooting, focusing on a variety of subject primarily the people that were enjoying the venues at the Surf City event. For me, it was opportunity to shoot street, but with a lot more sand and less clothing that I am usually accustomed to seeing on the streets of Los Angeles. 

The compact size of the camera particularly with the Olympus 12mm f/2 lens (24mm equivalent) made it a stealthy and compact alternative to the what now seems like a beast of a DSLR. This afforded me the ability to get in closer to my subject than I normally would feel comfortable when using a bigger camera, but which is especially important when using a wide angle. 

I found myself quickly winding through the crowds capturing the ever-changing scenes around me. Despite the high contrast lighting , the camera's metering handled exposure well, which was particularly important because I was recording jpegs rather than raw files to get a real sense of what this camera was capable of. 

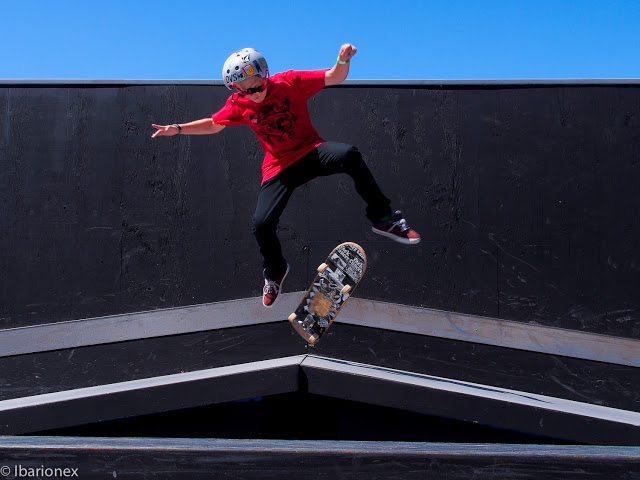
The camera also delivered when it came to capturing action in the form of skateboarders doing acrobatics that made my body ache just watching it. It was also the right tool when it came time to make a portrait. In each shooting situation, I didn't find myself wanting for my DSLR with respect to certain features or controls. 


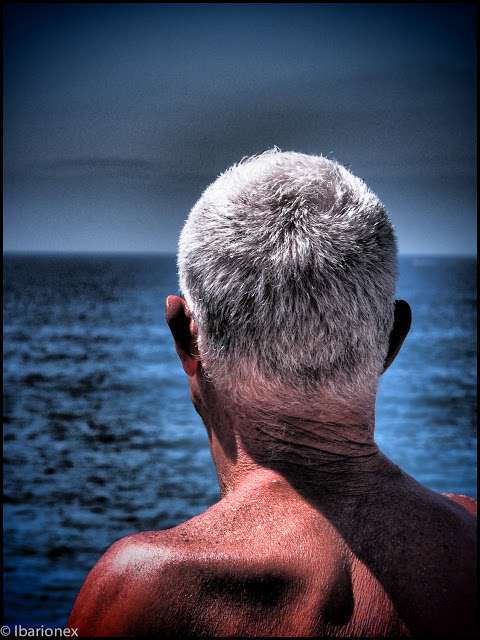
The camera features a set of art filters, which some people find gimmicky, but which I have come to really enjoy, particularly the Dramatic Tone filter which provides a grungy HDR look. But when I was shown that I  could now combine filters, I quickly discovered the Pinhole and the Dramatic Tone filter in combination produced some wonderfully unexpected results. 

You have to know that when it comes to Photoshop, I am not the kind of photographer who works on achieving this look using software. I'm often pretty conservative with the degree of image manipulation I use. So, the use of these filters allowed me the opportunity to play and experiment in a way that I don't think I'd ever consider in front of my computer. So, I actively shot with the Art Filter bracketing feature enabled which allowed me to not only capture my "straight" image, but also images that received the benefit of these special looks. 

Though I wish I'd had more time to spend the day shooting, I found that the OM-D E-M5 was a mirror-less camera that really delivered on the promise of a compact, stylish design that didn't sacrifice in terms of performance. Though I'm sure that a more exhaustive review might reveal some things that I might dislike, none such issues were immediately revealed to me as I was shooting and producing these images. 

When reading other reviews, there is such a focus on what feature or control a camera doesn't have in comparison to another and while I can understand the importance of that for certain types of photography or a photographer, I am primarily concerned with whether camera will allow me to make the kinds of images I'm striving to get. I'm pleased to say that not only did the OM-D E-M5 allow me to do that, but that the resulting images were shots that I was very pleased with. It certainly made my photography that morning very, very fun.